-
-
-
-
-
-
-
-
-
3D Photogrammetry with PhotoScan
-

- Home
- Tools/Links
- DH@Haskins Tutorials
- 3D Photogrammetry with PhotoScan
Making 3D Models with Photogrammetry
Getting Started with Agisoft PhotoScan
Carleton College
Download a PDF of this tutorial here
Contents
Additional Options and Next Steps
Introduction
Photogrammetry is the technique of taking multiple overlapping photographs and deriving measurements from them to create 3D models of objects or scenes. The basic principle is quite similar to the way many cameras these days allow you to create a panorama by stitching together overlapping photographs into a 2D mosaic. Photogrammetry takes the concept one step further by using the position of the camera as it moves through 3D space to estimate X, Y and Z coordinates for each pixel of the original image; for that is also known as structure from motion or SfM.

Photogrammetry can be used to make highly accurate and realistically photo textured models of buildings, archaeological sites, landscapes (if the images are taken from the air) and objects. Close range photogrammetry of historical objects offers the possibility of both digitally preserving artifacts before they may be lost or damaged, and of allowing a whole suite of digital measurements, manipulations and other analyses to be performed that allow insights into the material that might not be visible to the naked eye. The technique is gaining in popularity and usage, since it produces very impressive results comparable to high end laser scanning technologies for a mere fraction of the cost. Plus, it’s easy to get started!
This document will briefly discuss the 123D Catch app that is by far the simplest way to make a 3D model from photos, followed by a much more detailed tutorial of the major steps involved in making a model using Agisoft PhotoScan Pro.
Software
There’s an App for That
Autodesk’s 123D Catch is a free app for mobile platforms that lets you quickly create scans from images and automagically process them into models. The software is very simple to use and produces decent, if messy results out of the box, which can be edited and refined using their related desktop application.
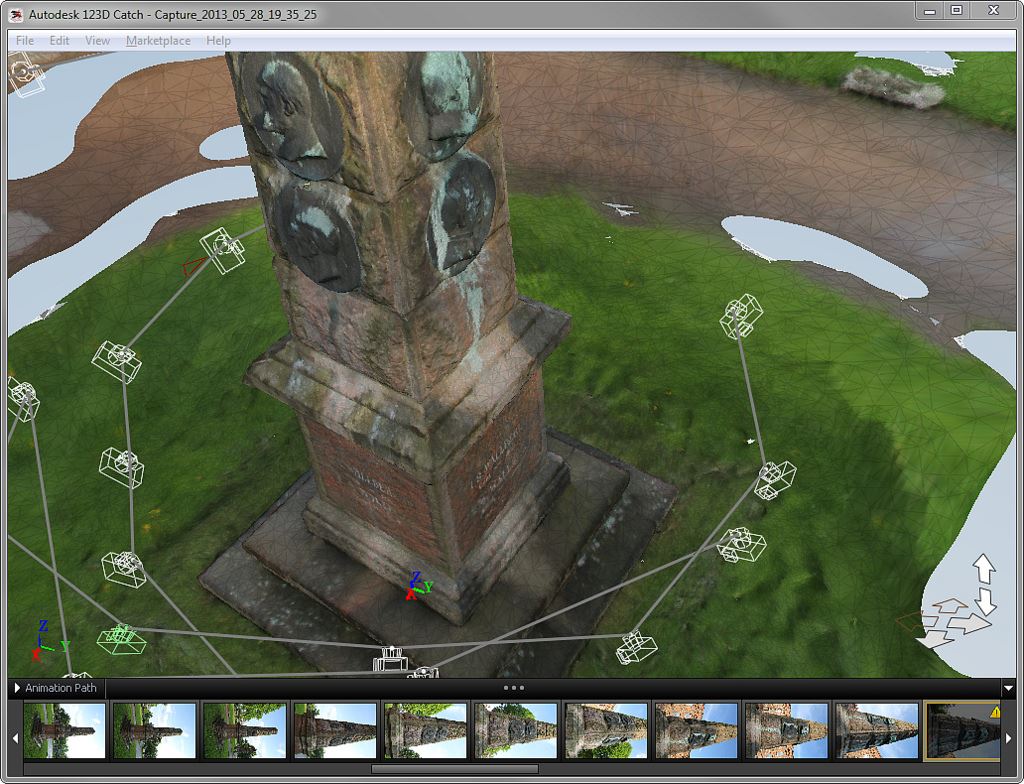
Autodesk has produced a very handy 123D Catch quick start guide and a number of video tutorials, which I recommend exploring to learn the software. They also cover some tips that are useful for photogrammetry in general.
Or you can just download the 123D Catch app and dive right in — it is very intuitive.
Agisoft PhotoScan
This tutorial will mostly detail the workflow for processing photos into 3D models using Agisoft’s PhotoScan Pro software. PhotoScan is a widely used application that has made the complex algorithms necessary for processing photos into 3D models accessible through a fairly simple to use graphical interface. It is not as simple as 123D Catch, but offers much greater control of each stage of the process, and will let us produce much more accurate results.
You will need to download the software in order to follow along with this tutorial.
Go to Agisoft.com/downloads/installer to download PhotoScan. A demo mode is available for free that will let you try everything except exporting and saving your model.
If you want to explore more, they offer a 30-day free trial of the full Standard or full Professional editions.
Long term, you will need to purchase a license to use the software beyond 30 days. Educational licenses are available for a very reasonable $59 for the standard edition, and a more expensive (but still orders of magnitude cheaper than a laser scanner!) $549 for the full Professional Edition.
The PhotoScan Workflow
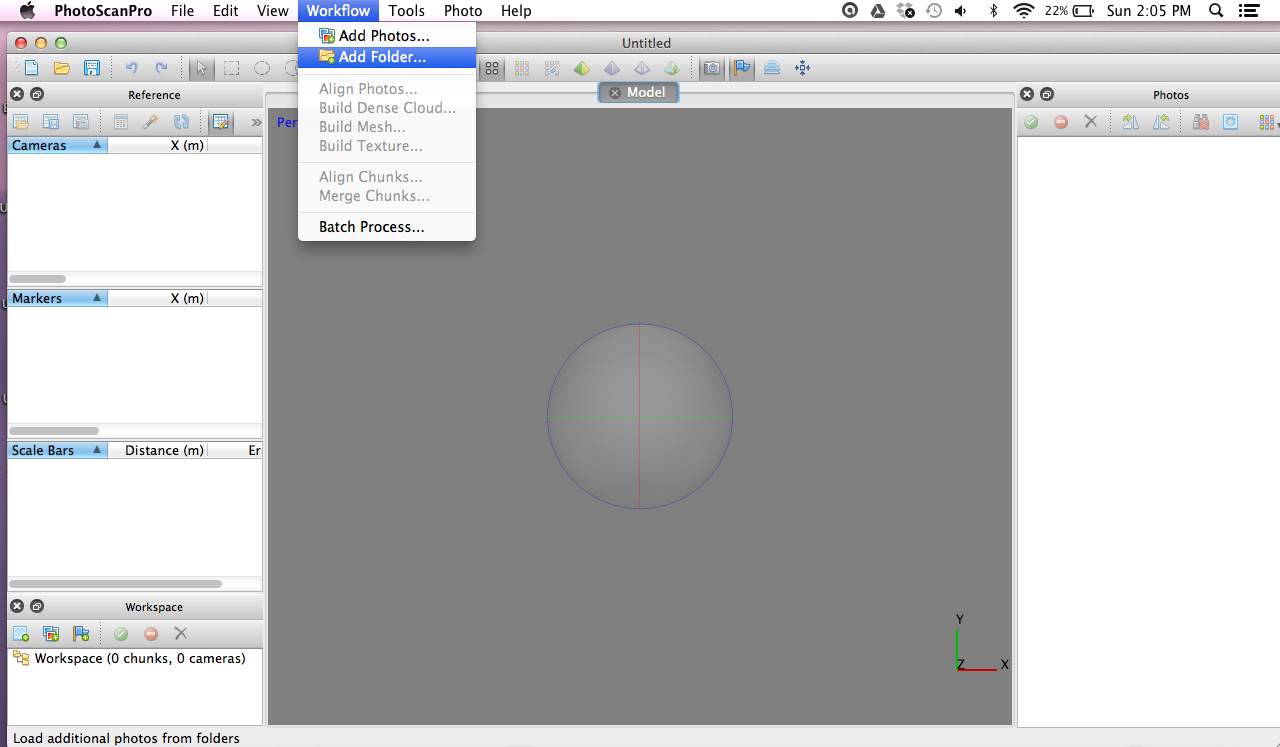
PhotoScan makes the order of operations easy to follow via its Workflow menu. Basic operations can be accomplished by stepping through the menu and performing each of the following tasks in turn.
● Add Photos (or Add Folder containing all photos from your shoot)
○ this first step loads all of your raw images into the software’s interface.
● Align Photos
○ the first processing step compares the pixels in your photos to find matches and estimate camera locations and 3D geometry from them
● Build Dense Cloud
○ once satisfied with the alignment, the sparse point cloud (a mere fraction of the total data) is processed into a dense cloud in which each matchable pixel will get its own X, Y, Z location in 3D space
● Build Mesh
○ this step connects each set of three adjacent points into a triangular face, which combine seamlessly to produce a continuous mesh over the surface of your model
● Build Texture
○ In the final step, the original images are combined into a texture map and wrapped around the mesh, resulting in a photo-realistic model of your original object.
In order to improve results there are various options and other tools in the software beyond these basic steps, but this tutorial will focus on the basic workflow.
Importing Photos
Step one is getting our data (our images) into PhotoScan.
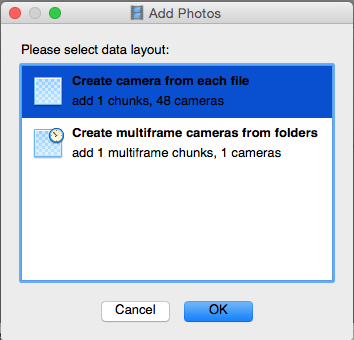
1. If you don’t have your own images, download a sample set of images here
2. Go to Workflow > Add Folder and navigate to the directory containing your images
3. Select Create camera from each file and click OK
 (At this point, you would probably want to mask out the background behind your objects in order to let the program focus on the data you are interested in. This can be tedious and time consuming if done manually, but there are ways to automate the masking process significantly. We will skip this step for now.)
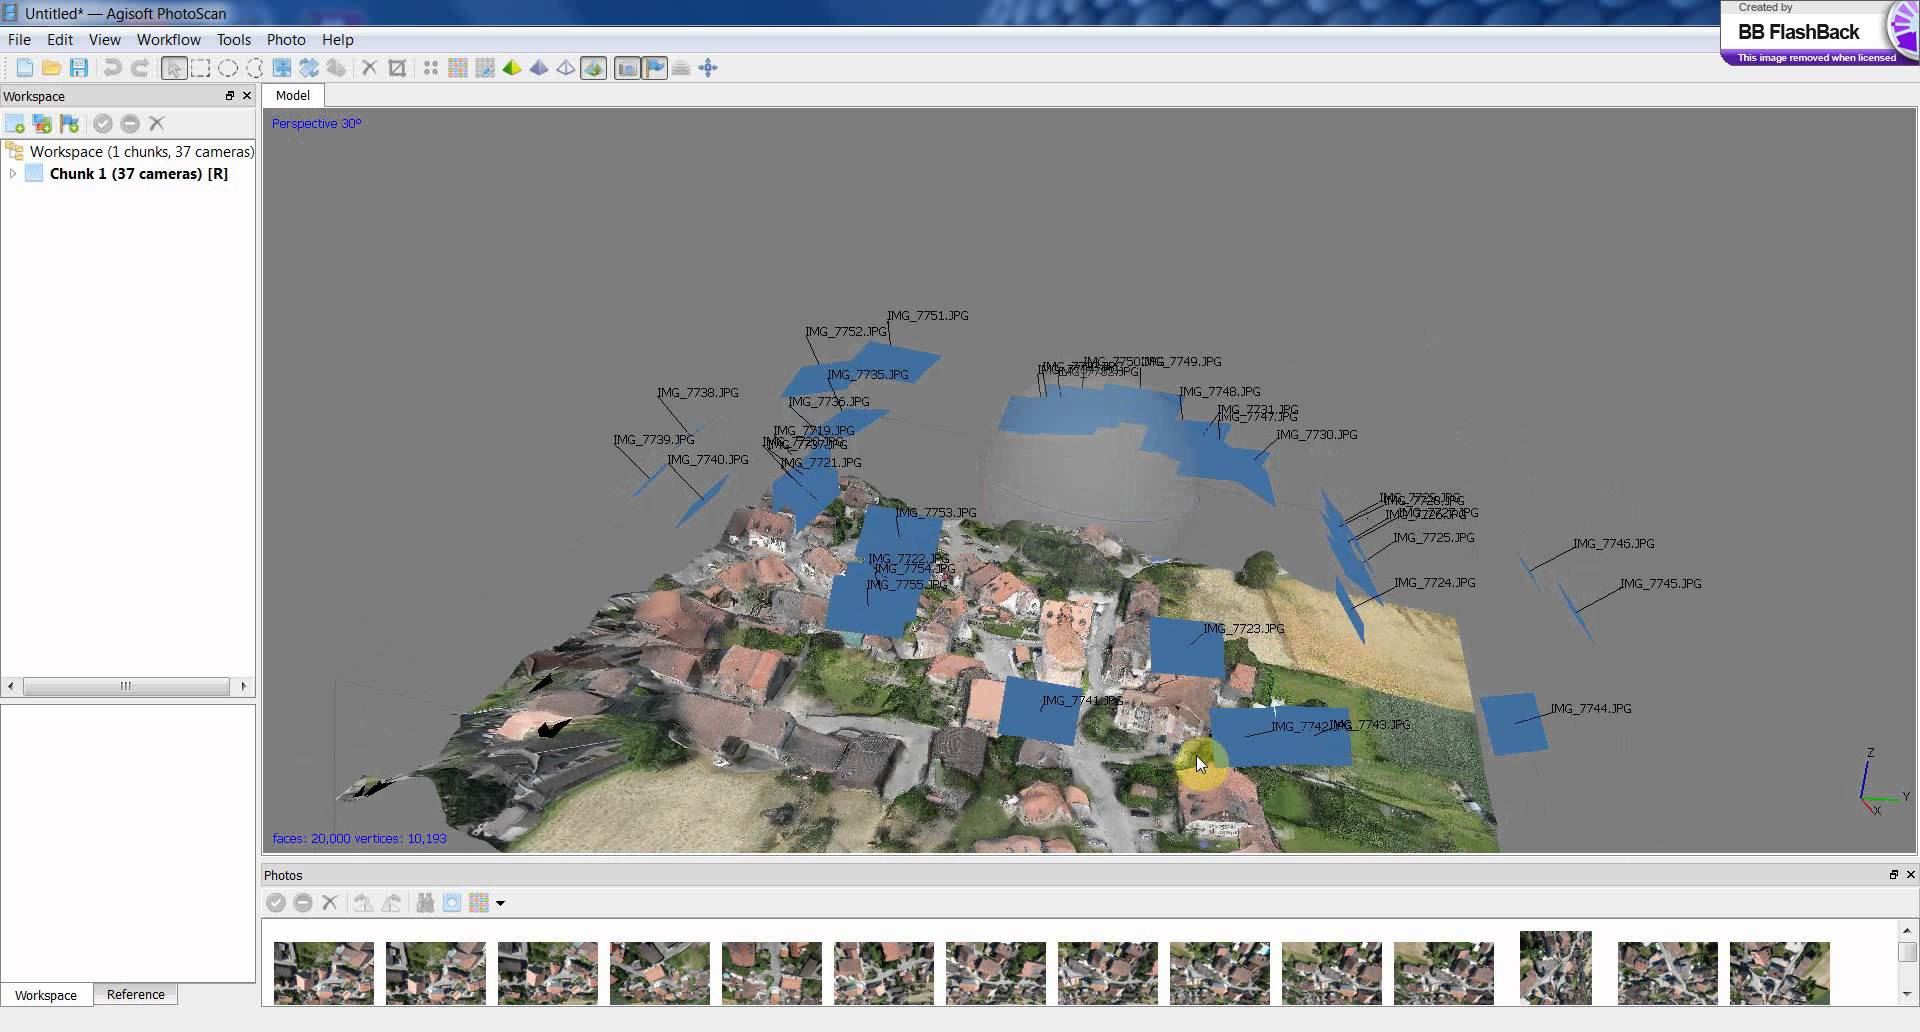
Aligning Photos
It is time to tell the software to compare the photos and figure out how they overlap in 3D space. This is the magic ingredient of the photogrammetry process, without which nothing else would work.
1. Go to Workflow > Align Photos
2. Accept the default values and hit OK
a. If you had created masks in step 1 you would want to go into the advanced options menu and enable the Constrain Features by Mask checkbox.
This step will take a while, so you might want to go do something else while you wait.
The result of this process should be a sparse point cloud of your object that is spotty, but recognizable, surrounded by blue squares representing each camera position in 3D space. We have a 3D representation of our object! But now we have to refine it.

Check the blue squares to make sure they all look good. If there are any gaps, some images may not have aligned. You can select the photos individually and it’s position will be highlighted in pink. Right-clicking an image will give you several options for either disabling cameras (if they are too blurry or contain bad data), resetting alignment, or aligning photos that got missed the first time around.
Editing the Sparse Cloud
Once you are satisfied with the alignment of all enabled cameras, it is a good time to get rid of any clearly bad data points. For editing, it can help to remove the cameras to see the object better.
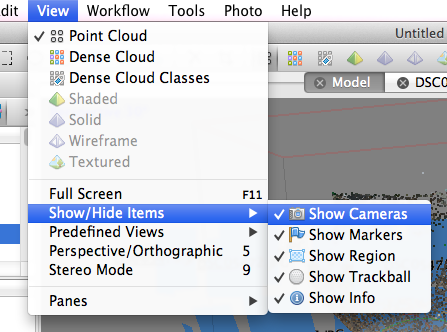
1. Go to View > Show/Hide Items
2. Click on Show Cameras to turn the blue square off
a. You can do the same for the trackball and the region bounding box
The editing tools can be found next to the mouse pointer image, and will let you select points to be deleted.
1.  Use the indented-circle-shaped lasso tool to select points and highlight them pink.
2. Press your delete key to remove these points

When you are satisfied, it is time to extract all the usable data from each photo and build the dense cloud.
Building Dense Cloud
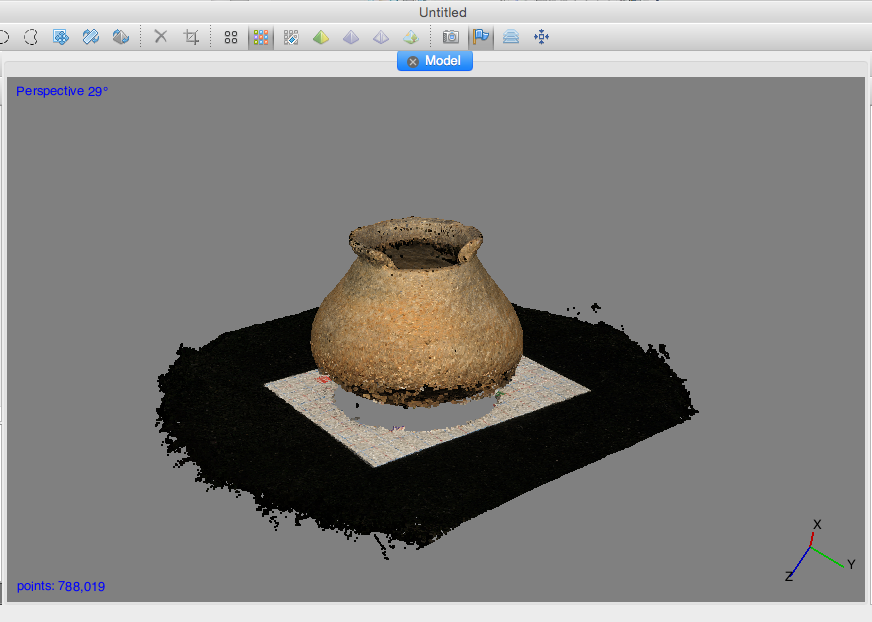
This step will use the aligned photos to generate a point cloud that should be dense enough that it will look like a solid model from a distant zoom.
1. Go to Workflow > Build dense cloud.
2. You can set the Quality value as desired.
a. Usually you would want Medium or High but for this demo, choose Low to speed the processing.
To view the results, you need to change the display style using the top ribbon.
1. Click the option with 9 colored dots to see the shaded point cloud.
a. The result should look pretty good!
2. You can also click the button next to it to “Display dense cloud classes”, a shaded representation with color values removed.
Shaded point cloud
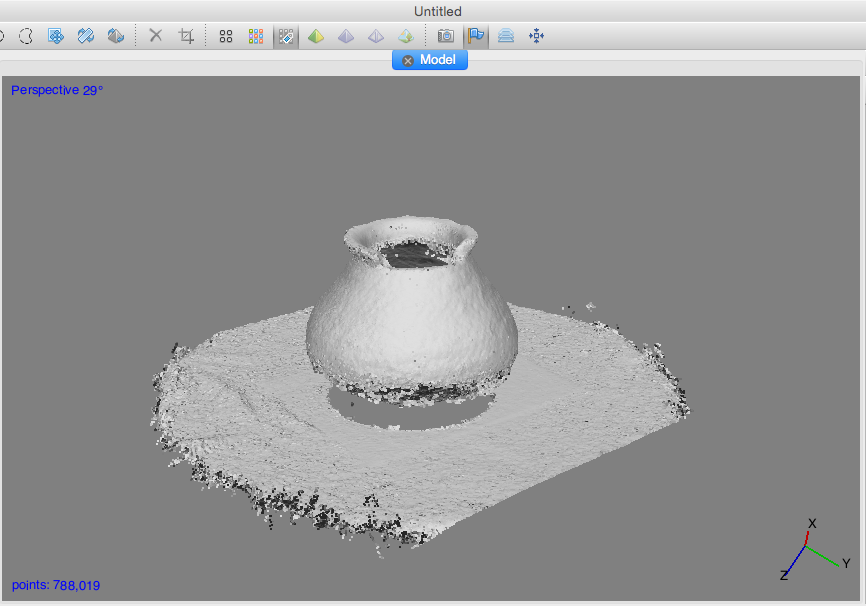
Color-stripped point cloud
You can do some more data cleaning at this stage to remove any bad data from your model, and this would be a good time to remove the table or surface your object was sitting on.
Building Mesh
This cloud looks great from a distance, but if you zoom in you’ll notice that it is really a cloud of points, as the name suggests. We need to connect them into faces to make a continuous surface mesh.
1. Go to Workflow > Build Mesh
2. Make sure the Source Data is Dense Cloud
3. Face count can be set as high as desired.
a. In general it is best to set it High, since it is easy to decimate the mesh later to save a more lightweight version of a high quality original. Conversely, it is not possible to add more detail to a very generalized model.
b. I would recommend setting it to no less than 500,000 in general, but for this demo you can use a lower setting for speed.

Explore the different display options by clicking the pyramids to view a Shade, Solid, or Wireframe view of the resulting mesh.
If the results look blotchy, remember that this is just color shaded from the point RGB values. To make a photorealistic model, we need to wrap a texture map around the mesh.
Building Texture
Almost there!
1. Go to Workflow > Build Texture
2. You can try different blending mode settings, but Mosaic or Average should give the best results, depending on the quality of your photos.
The processing should be fairly quick for this step.
1. Click the textured pyramid display option which should no longer be grayed out
Congratulations, you have a photorealistic 3D model!

Additional Options and Next Steps
There are a number of additional steps you can take to improve your model.
Scaling the Model
Photogrammetry does not produce models with a known scale so you must add one manually. The easiest way is to include an object with known scale in the photos, e.g. a ruler, yardstick, or the graph paper in the example photo set. As long as you can see the same points from at least three photos you can use these two set a scale, by creating markers and then adjusting the distance between them.
Producing a 720 degree model
With an object sitting on a surface, you cannot get complete coverage of the bottom side. The solution is to flip the object over and take photos of the other side as well.
These photos can be split into chunks, which can be processed separately, then aligned and merged into a complete 720 degree model, if you will. This is a common enough operation that Align Chunks and Merge Chunks are included in the Workflow menu.
Exporting the Model
Your finished model can be exported in various formats for display or import into other 3D analysis suites, animation software or game engines. Common formats are
● 3D PDF: an interactive format that is widely accessible, as the model can be viewed, manipulated and even measured using the ubiquitous and free Adobe Reader
● Wavefront (.obj) and Collada (.dae) are the most portable 3D mesh formats. If you are working with other animation platforms like Blender or game engines like Unity 3D, these formats can be easily added as assets to your project.
● Pointcloud (LAS, .txt, etc.) these formats are probably the most future proof for long term storage, and also offer many options for secondary analysis in other tools like Geomagic and Meshlab.